No Need to Knead: Easy Homebaked Bread
Photos by Michael Piazza
Author’s note: This story appeared in the Winter 2018 issue, debuting in December 2017. I have since returned to sourdough and successfully made a starter, kept it alive in the fridge and now I bake a loaf or two every couple of weeks. But the yeasted bread below is dead simple, uses only 1/2 teaspoon of yeast and can be very easily modified if seeds and specialty flours are unavailable. Try all white flour. Try all whole wheat. Use honey instead of malt syrup. Use any seeds you like, even nuts. The point is to bake and enjoy it. Once upon a time, the stress of sourdough made me throw in the towel, literally. But I returned, persevered and succeeded. You can too. –SB
This is a story about bread. And failure. And then back to (basic) bread again.
Why? Well, my plan to bring you an easy, set-it-to-memory recipe for a no-knead, hearty, delicious loaf of bread you can bake every week was derailed by a bout of over-experimentation and overconfidence. What began as a week fine-tuning my beloved recipe quickly turned into an exhausting few days of scribbled note taking, precise measurements and a kitchen coated with a deep dusting of flour.
You see, instead of focusing on the task at hand, I tried to make a sourdough starter. From scratch, in my kitchen, with only the accumulated microbes in the air to inoculate it. In fact, I made three different versions with three different flours. And then I fed them and babied them—each in their own very specific way—all with an eye towards making my usual no-knead loaf, replacing the commercial yeast with starter only.
Sourdough’s all the rage these days: Easily digestible, it’s naturally leavened with a lactobacillus culture, so it’s the darling of fermented foods enthusiasts everywhere. It’s practically health food. Of course I’d want to introduce this good probiotic bacteria into my recipe! And during a chance encounter with the co-owner of one of the area’s best bakeries I learned that the natural yeast found on organic grape skins can inoculate a starter—and even become the basis for a decades-old “mother.” To be a real baker, I decided, long slow fermentation with one’s very own starter was the only way to go.
This was serious business. I stirred some crushed grapes into a white flour and water slurry, shook up another grape-less batch using stoneground rye and mixed yet a third with straight whole wheat. I waited the requisite time. I nurtured and refreshed and sniffed (“Getting more sour!”—“On the right track!”) and when I was sure the starters were as bubbly and alive as they would ever be, I set out to bake.
I’m a tinkerer by nature. If a cooking method seems difficult or overly complicated, I’ll poke around in books and online for a while until I find at least six other ways to do it, and then I’ll combine them into something simpler that works better for me.
But for bread? This type of foolish tinkering was my undoing, and I utterly failed. I studied the advice of three(!) artisan bread books, King Arthur Flour’s very informative blog and the website of a jolly sourdough-crazed British lady, all offering vastly different techniques.
It’s clear from my results that I should have followed just one expert alone. Instead, I had too much information from too many sources, and what eventually came out of the oven—regardless of which starter I used—were loaves so dense and heavy they weighed over three pounds. The crusts were so tough I could hardly get a knife through. And while the flavors were nice and pleasantly sour, these breads were flat as pancakes and tough as leather. Not at all what I had hoped for.
Did I jump the gun and use the starters before they were ready? Dribbled droplets of them floated in water, which one source told me was guaranteed proof of life. Had I not given the dough the right number of fold-overs and mini-kneads to activate the gluten? I’d (uncharacteristically) followed the instructions of another expert word for word on that front, but even that didn’t give the dough any lift.
It all just seemed too technical for me, too involved. Twice-daily feeding, stirring, measuring, folding-over and resting. All this wasted time, all this wasted flour, only to have the results better suited to life as a doorstop than a place on the tabletop. Stressed out and under deadline, I threw in the towel and put the sourdough starters in the fridge for another time. I’ll go back to them someday armed with a single expert by my side. I’m determined to get this right, to find a simplified method for flour-only bread like Michael Pollan’s gorgeous loaves in Cooked. Wish me luck—goodness knows I’ll need it.
So once I’d set the sourdough aside, it was back to basics for me.
I had started baking bread at home about a dozen years ago—like everyone in the mid-aughts, I’d read about Jim Lahey’s “no-knead” loaves requiring nearly no work and promising nearly professional results and thought, “Even I can do that.” Relying on a miniscule amount of yeast, a long, slow ferment and a moisture-trapping bake inside a blazingly hot covered Dutch oven, the process couldn’t have been easier. And it worked, producing a white “artisan-style” loaf with a nice crust and pleasant crumb—it wasn’t perfect, but it did the trick, especially warm from the oven and spread with soft butter.
After a few years of baking these loaves sporadically—maybe once or twice a month—I thought I’d try my hand at making something more substantial and hearty. White bread was falling out of favor, and I wanted my kids to eat something more nutritious for toast and sandwiches. Turns out, this hands-off approach and long overnight rise is perfect for whole grains. After more research and a few test loaves, my recipe was complete: very little yeast, a bit of local honey, some stoneground rye and whole-wheat flour mixed with strong organic bread flour. I’ve been making it ever since.
And my family loves it—slathered with sweet butter and honey, mashed avocado with chilies or peanut butter and jam, it’s a winner. Baking keeps the kitchen warm in winter, it smells heavenly fresh from the oven and having a weekly appointment with this recipe isn’t arduous, it’s a ritual.
I’ll try sourdough again one day, but for now, this delicious multigrain loaf does the trick.
This recipe is so simple that, even if you’ve never baked bread before, you should be able to produce a pretty respectable loaf. It relies on time and patience—not finesse or know-how—to create a long-fermented dough using a mere ½ teaspoon of commercial yeast. It’s full of whole grains and flavorful seeds and, if you’re up for the challenge, some flour you’ve ground yourself. It feels like a project, but a successful one(!) as the overnight ferment does essentially all the work. If you get the timing right, you can stir together a dough on Saturday morning, leave it to do its thing for 24–36 hours and bake a loaf on Sunday afternoon, just in time for dinner. It keeps beautifully, and it’s even better toasted.
2 cups warm water
½ teaspoon granulated commercial yeast
2 tablespoons local honey (or barley malt syrup for a richer, darker loaf)
2 cups organic white bread flour, plus more for shaping
1 cup local stoneground rye flour
1 cup local stoneground whole-wheat flour (or your own home-ground flour)
1 tablespoon plus 1 teaspoon sea salt
2 tablespoons whole flax seeds
2 tablespoons raw unhulled sesame seeds
1 tablespoon coarsely ground cornmeal
Special Equipment:
Large bowl Flexible plastic dough scraper or rubber spatula
Dutch oven with lid
Baker’s rack, for cooling
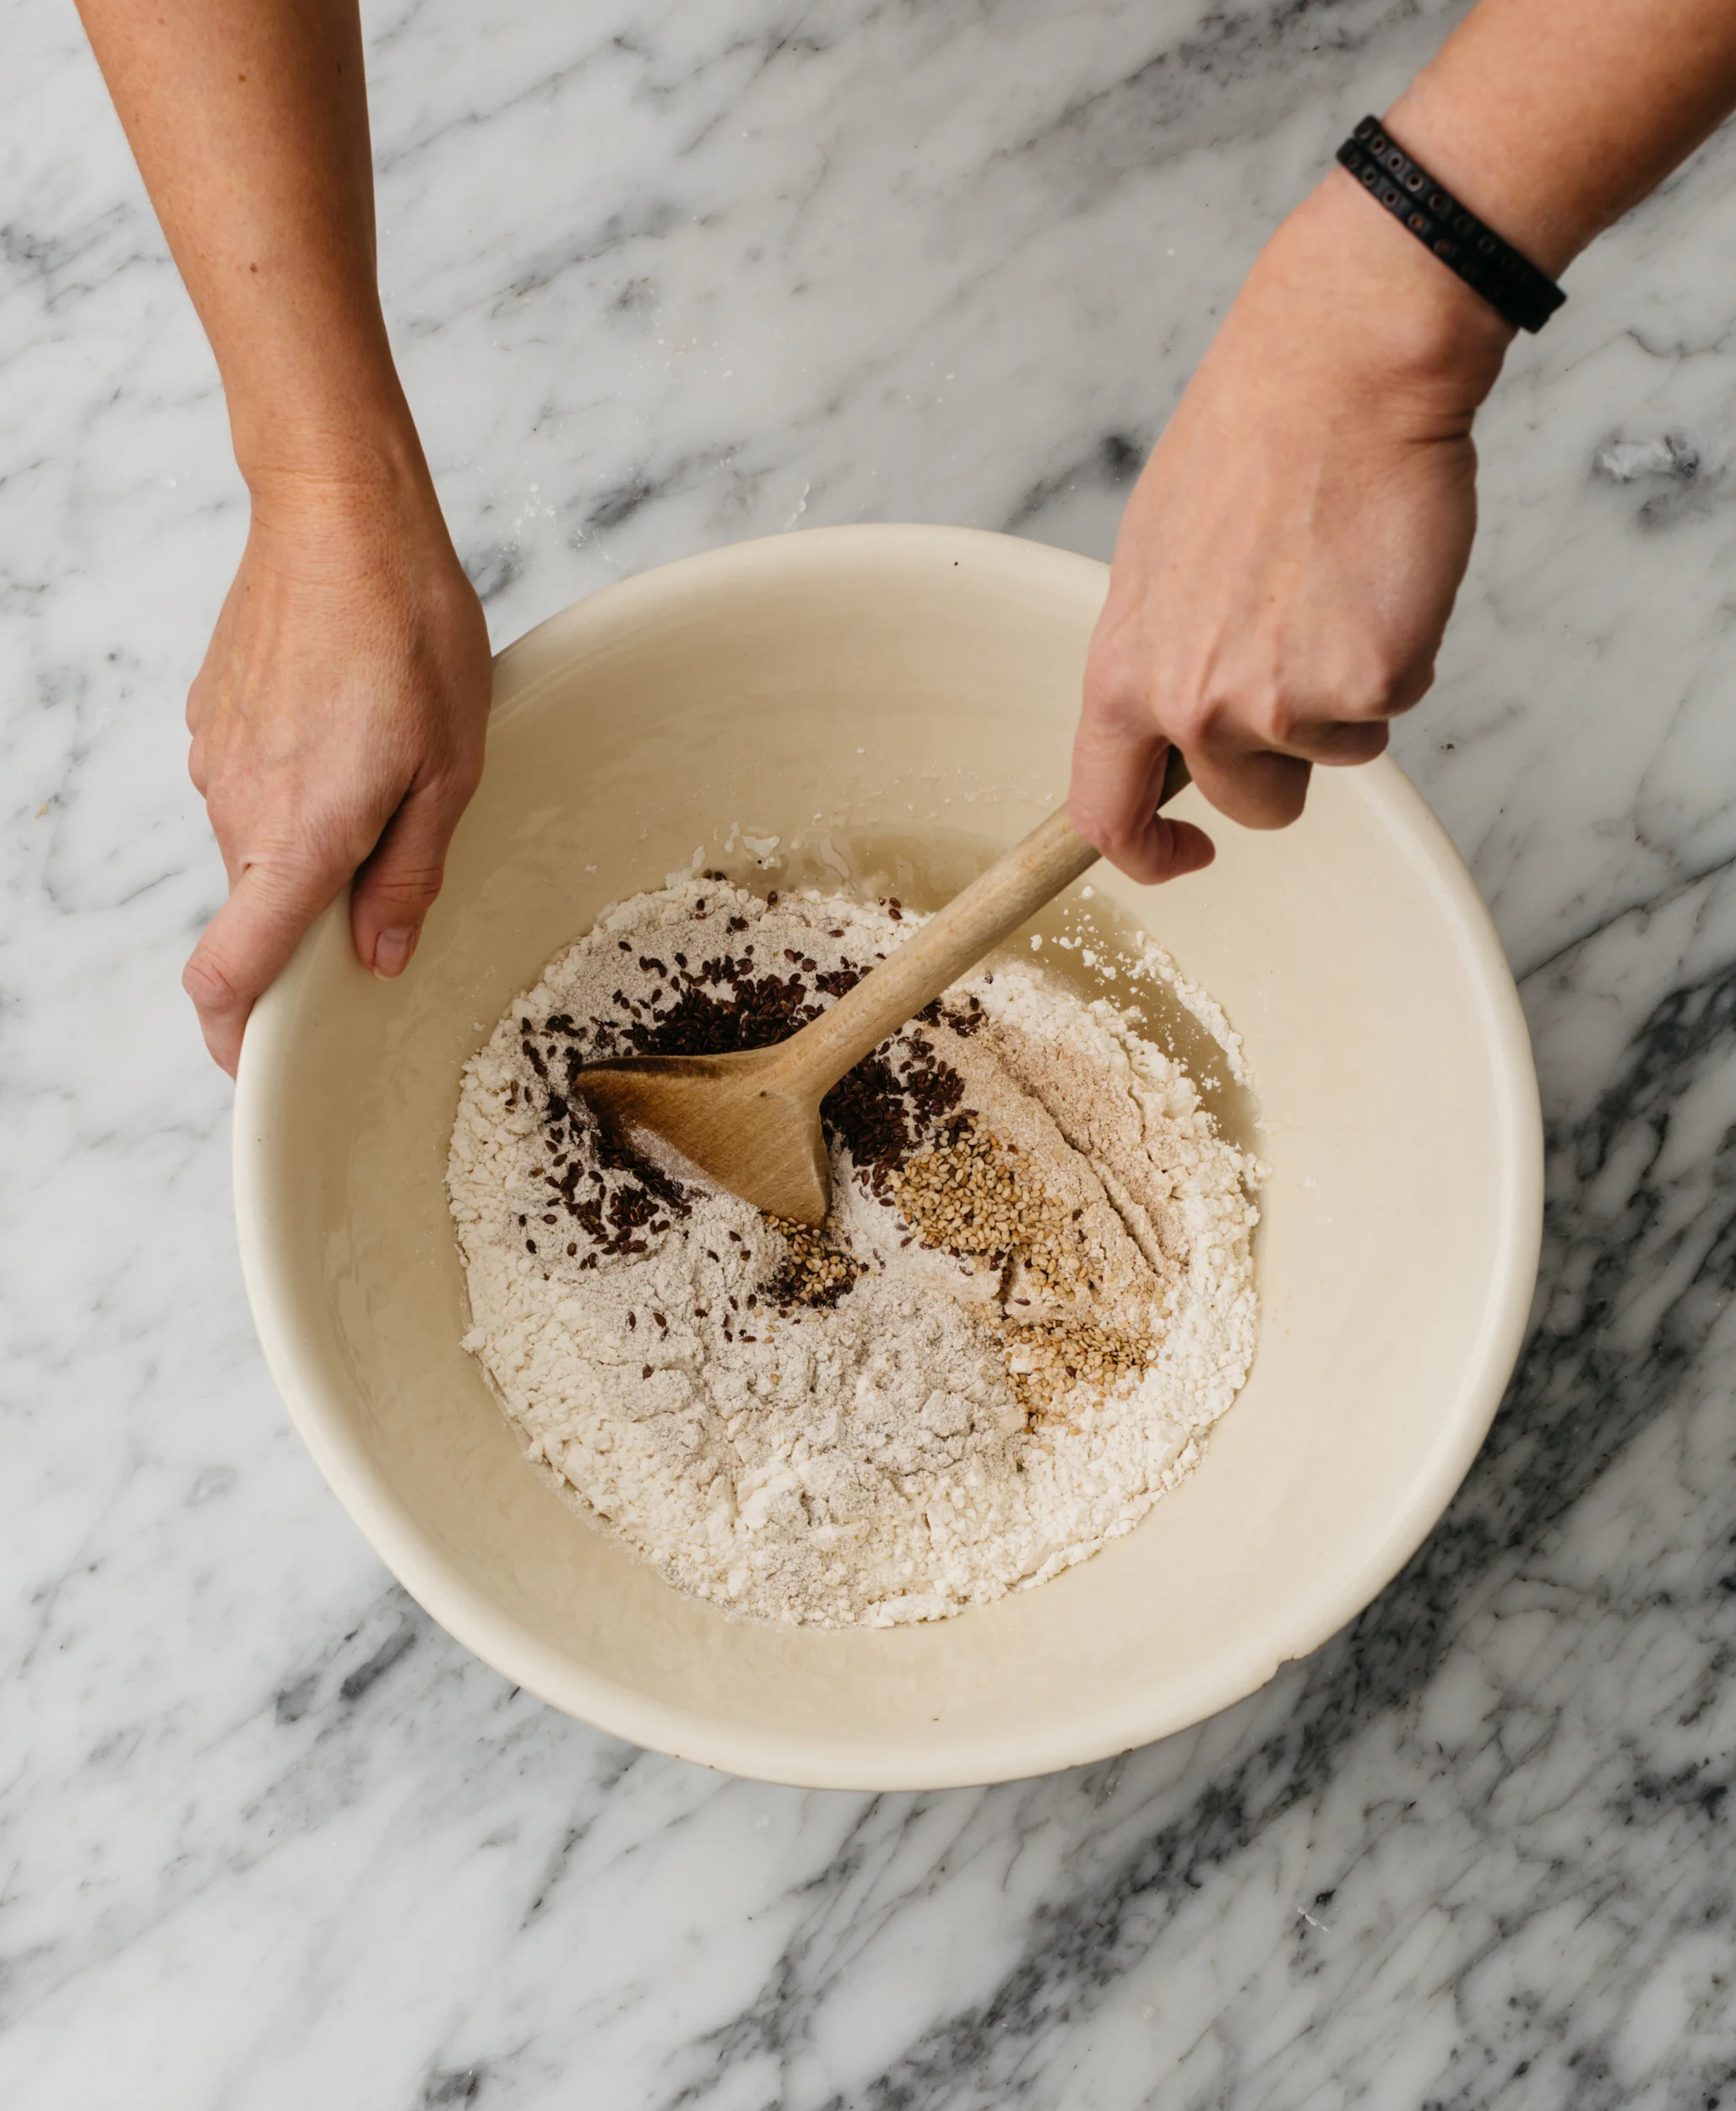
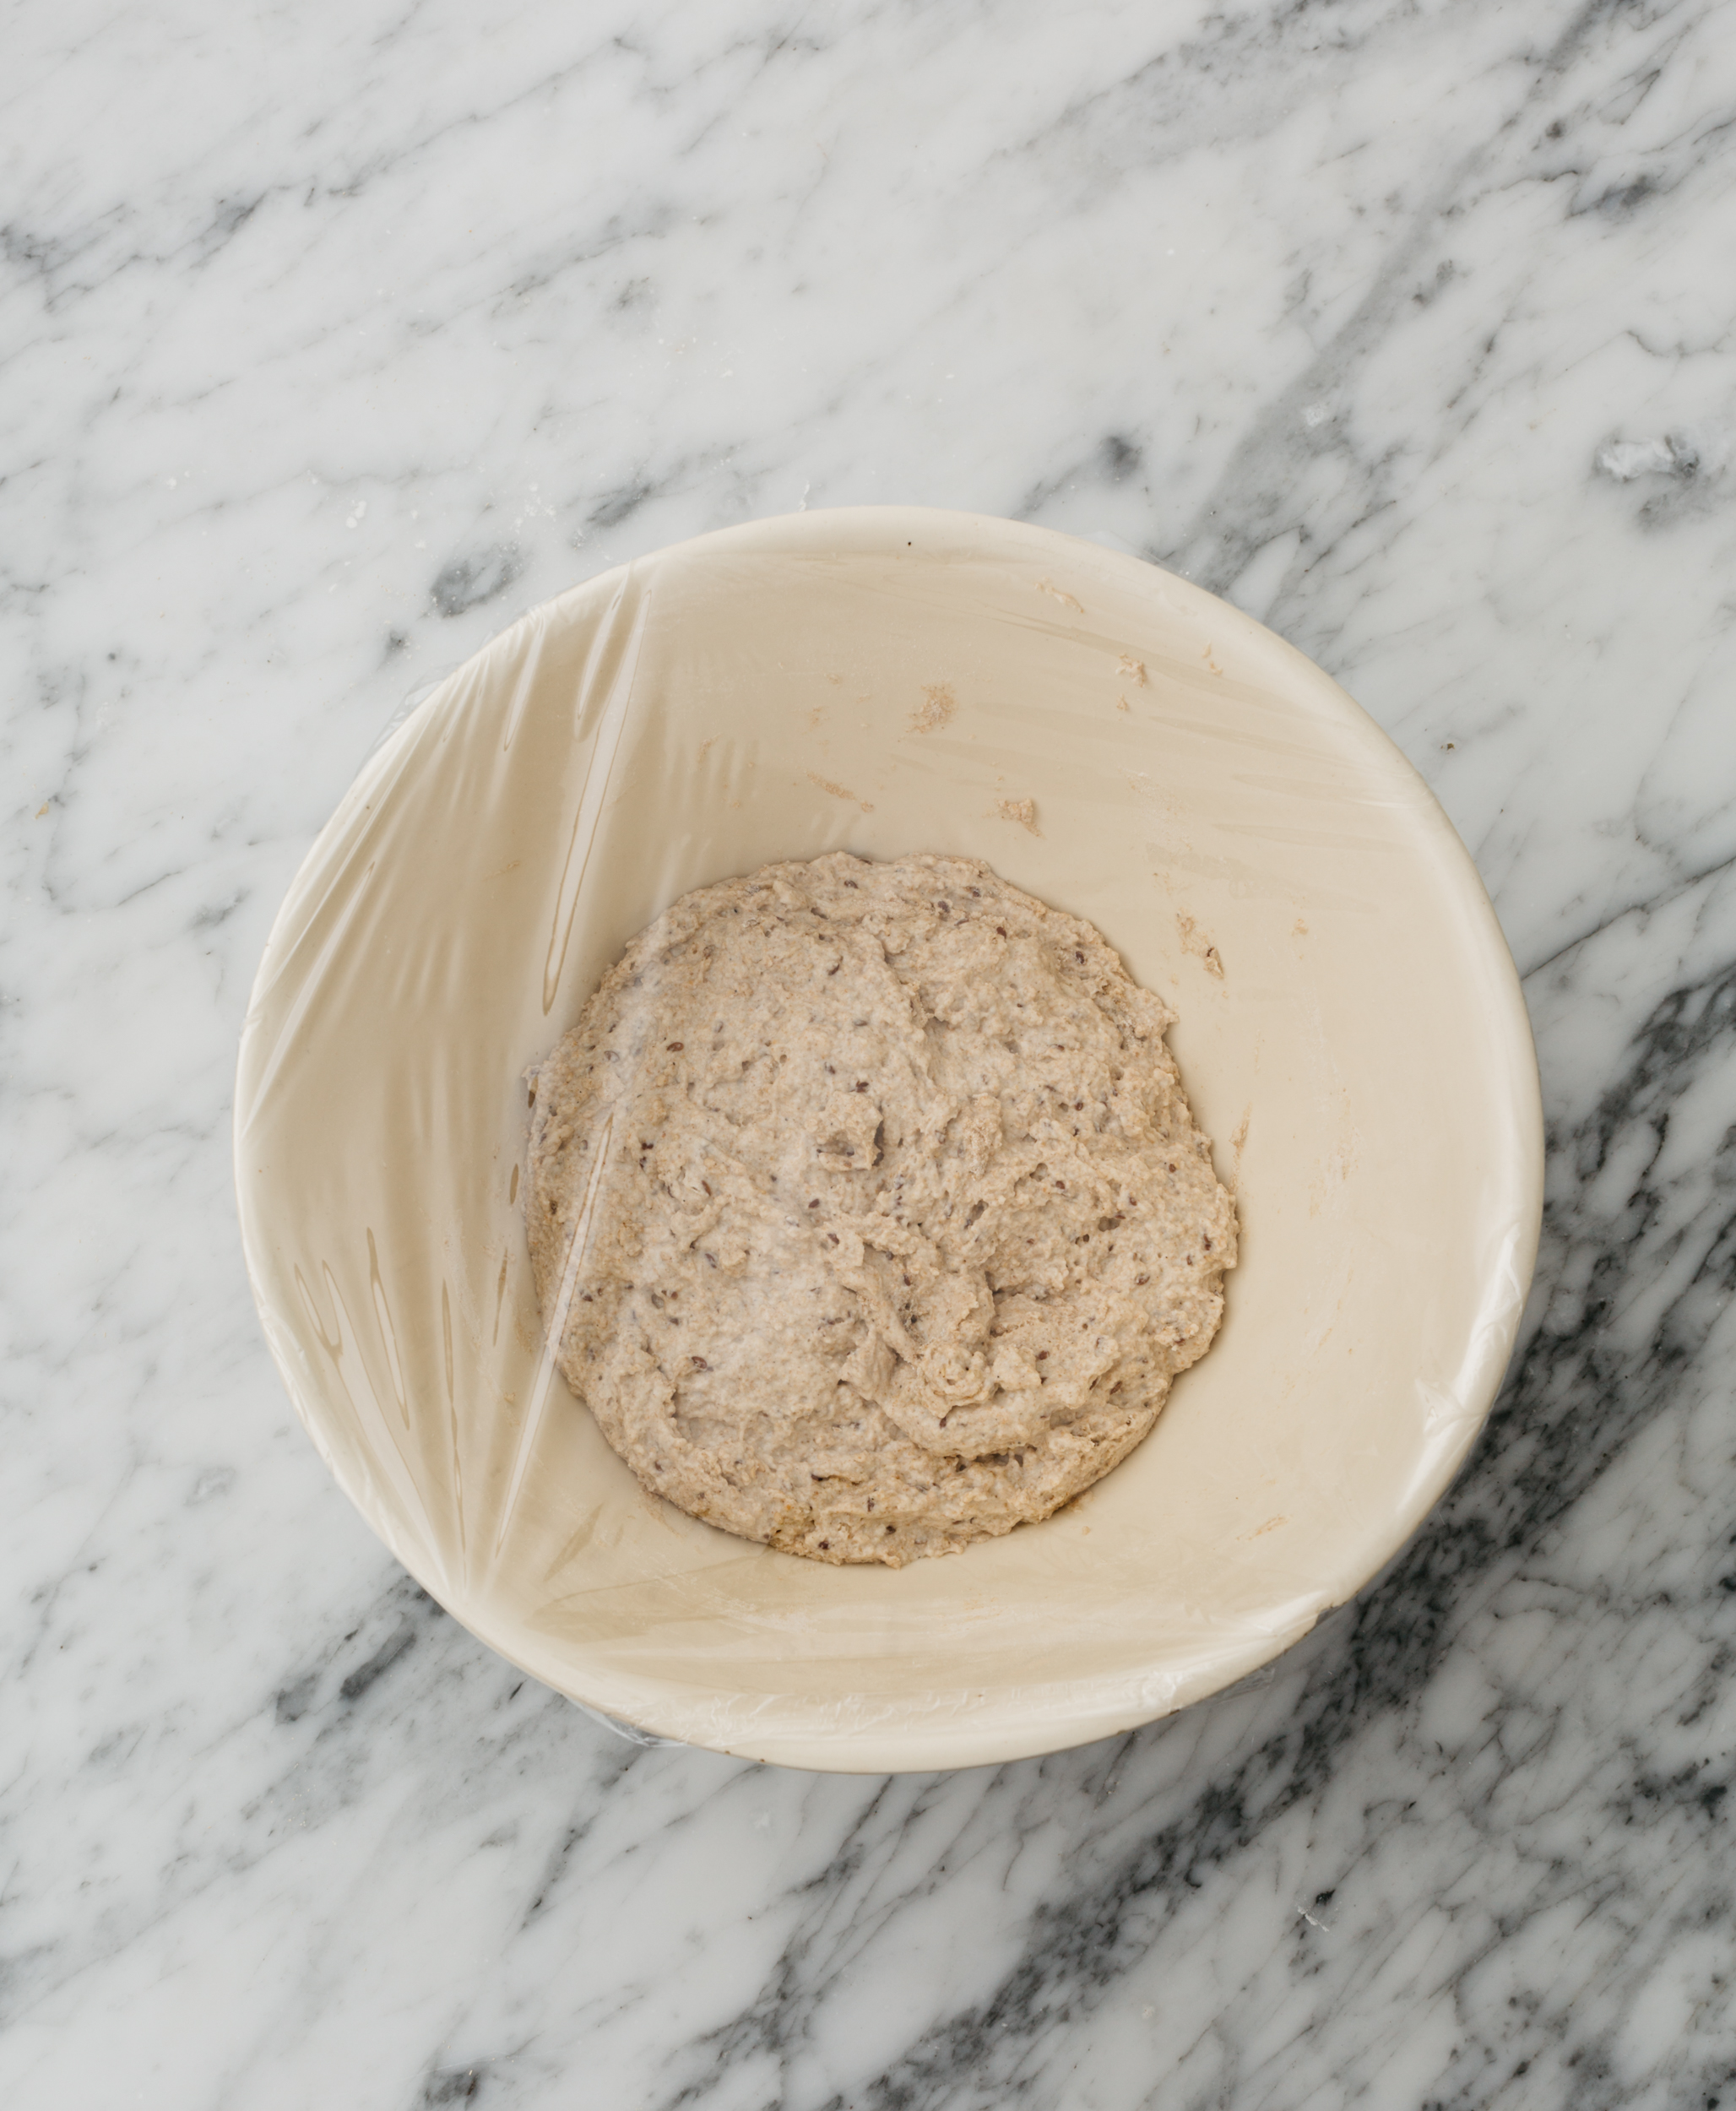
In a large bowl or a hard plastic tub, stir together the water, yeast and honey and let sit until foamy, 1–2 minutes. Add the 3 flours, salt and seeds and stir until a craggy, ragged dough forms. Scrape down the sides of the bowl, cover with plastic wrap and set aside overnight, anywhere from 24 to 36 hours—this dough is very forgiving, time-wise, but don’t leave it much longer than 36 hours without refrigeration.
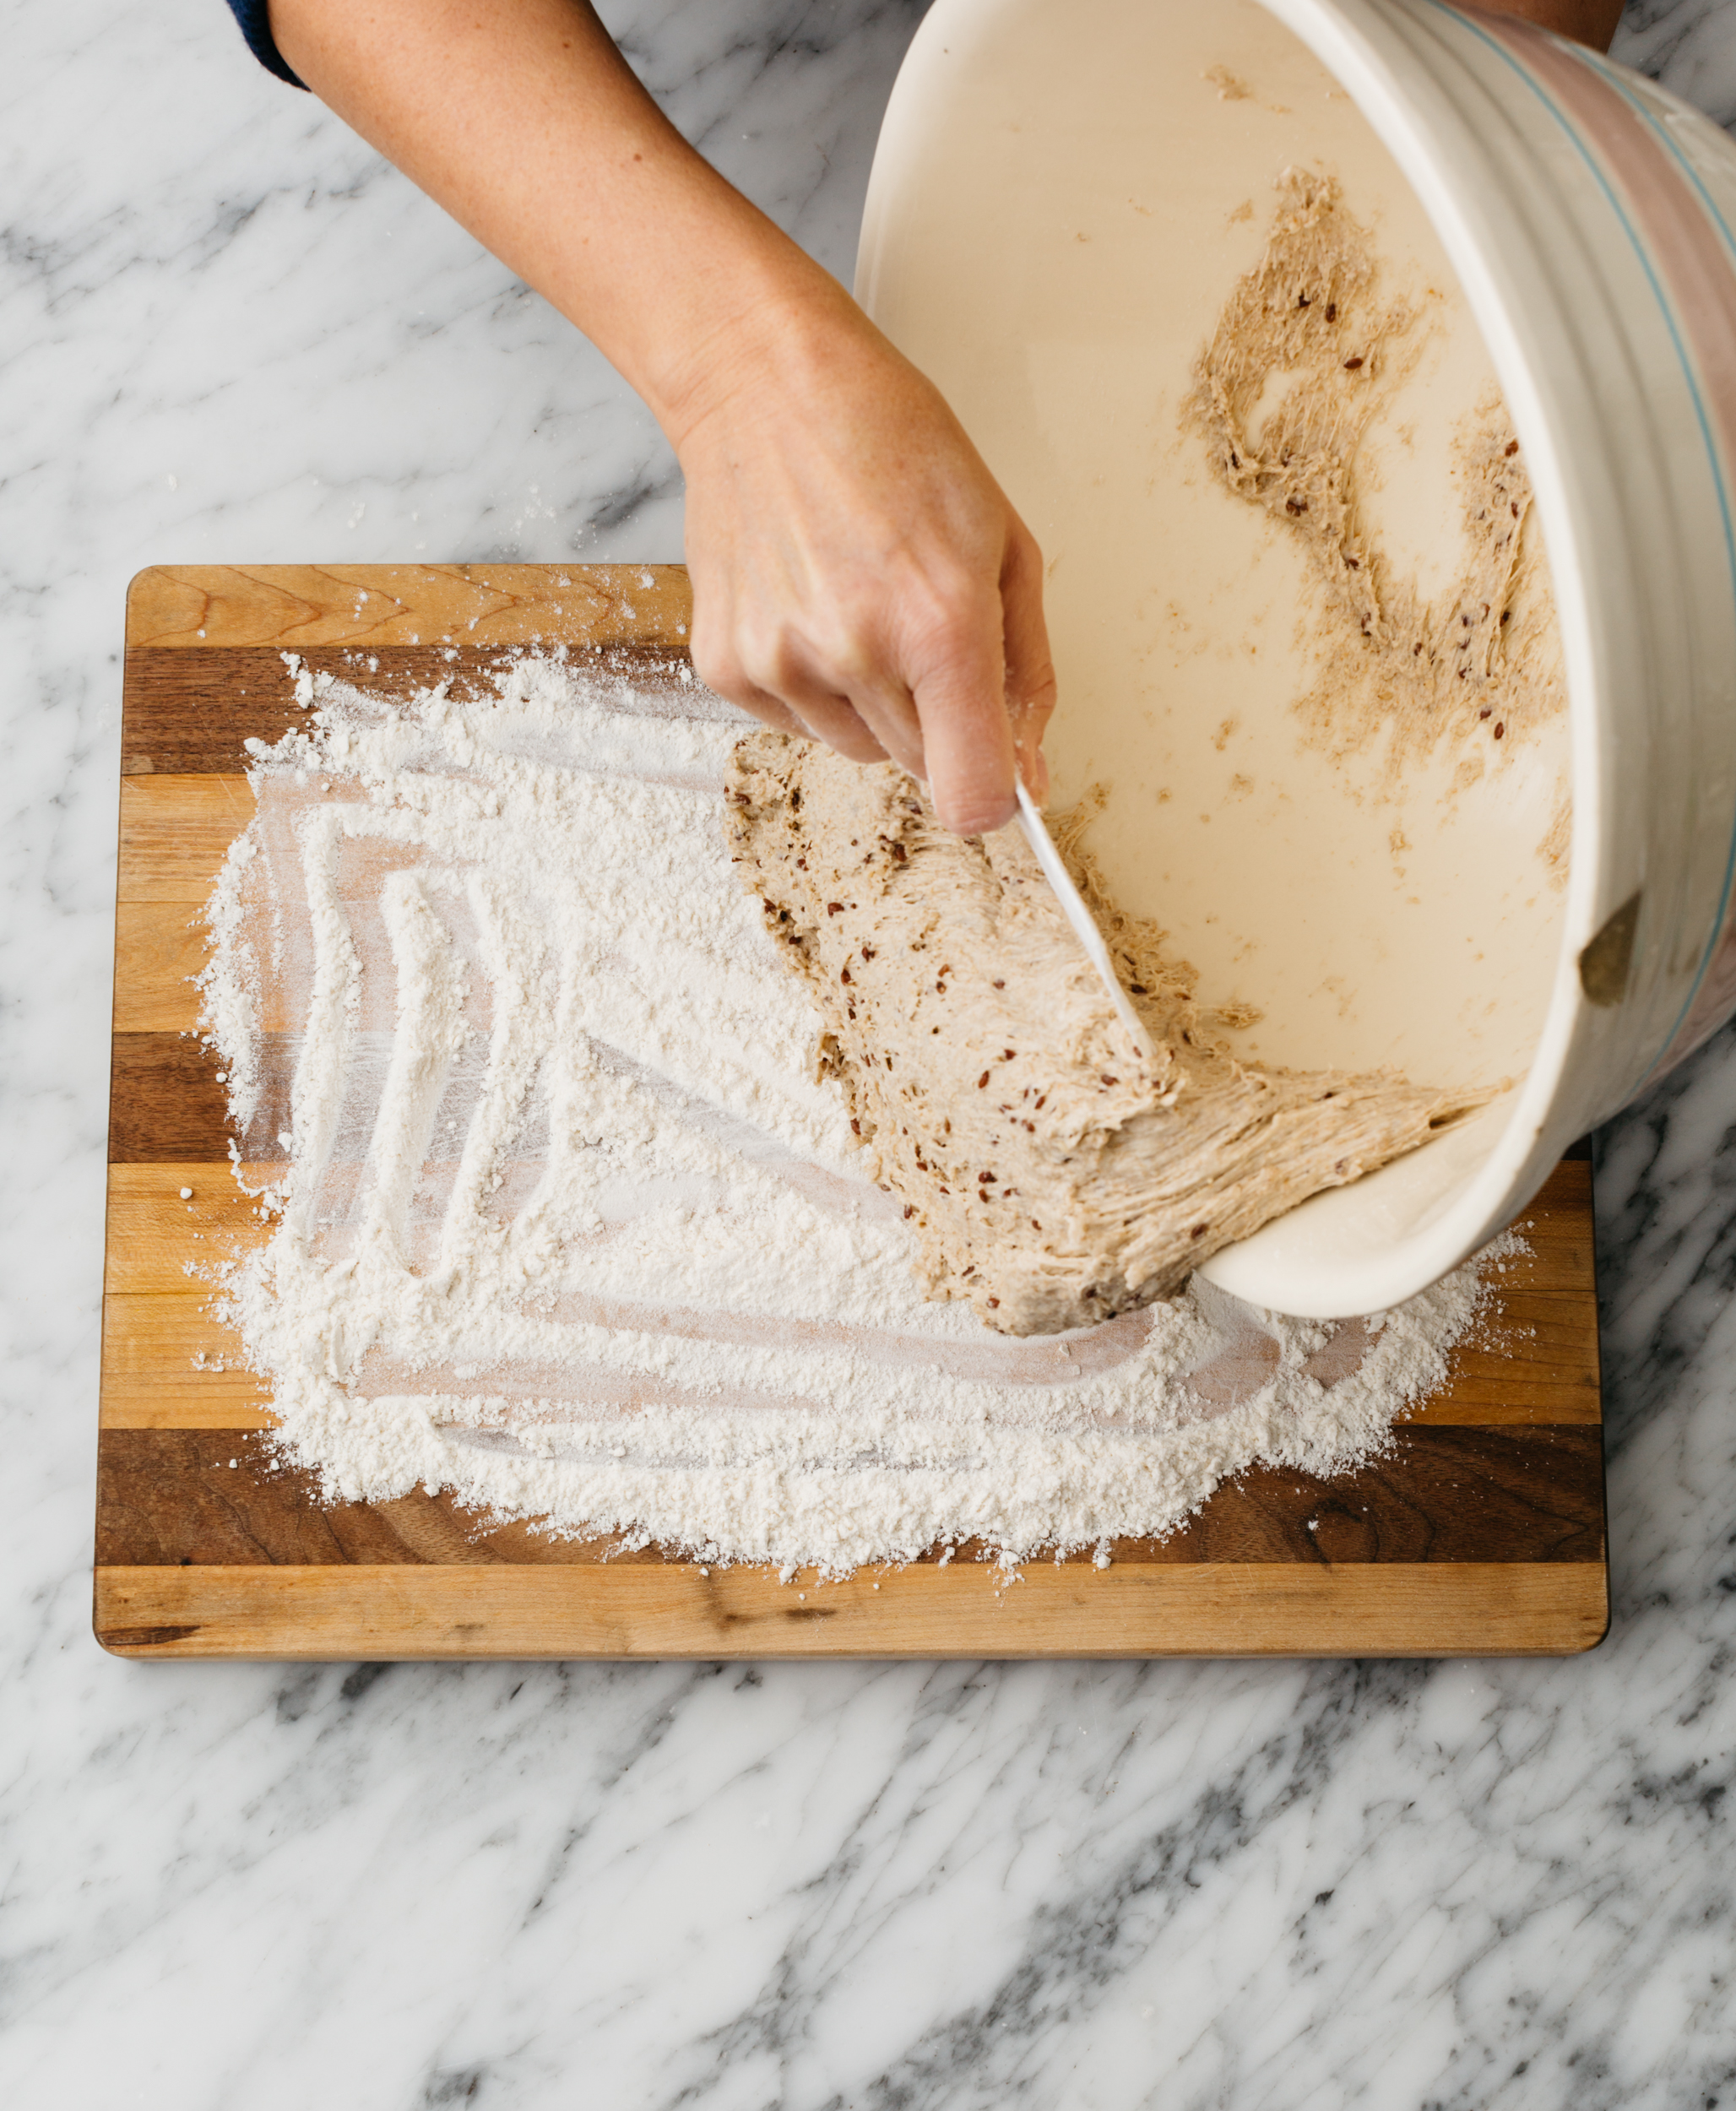
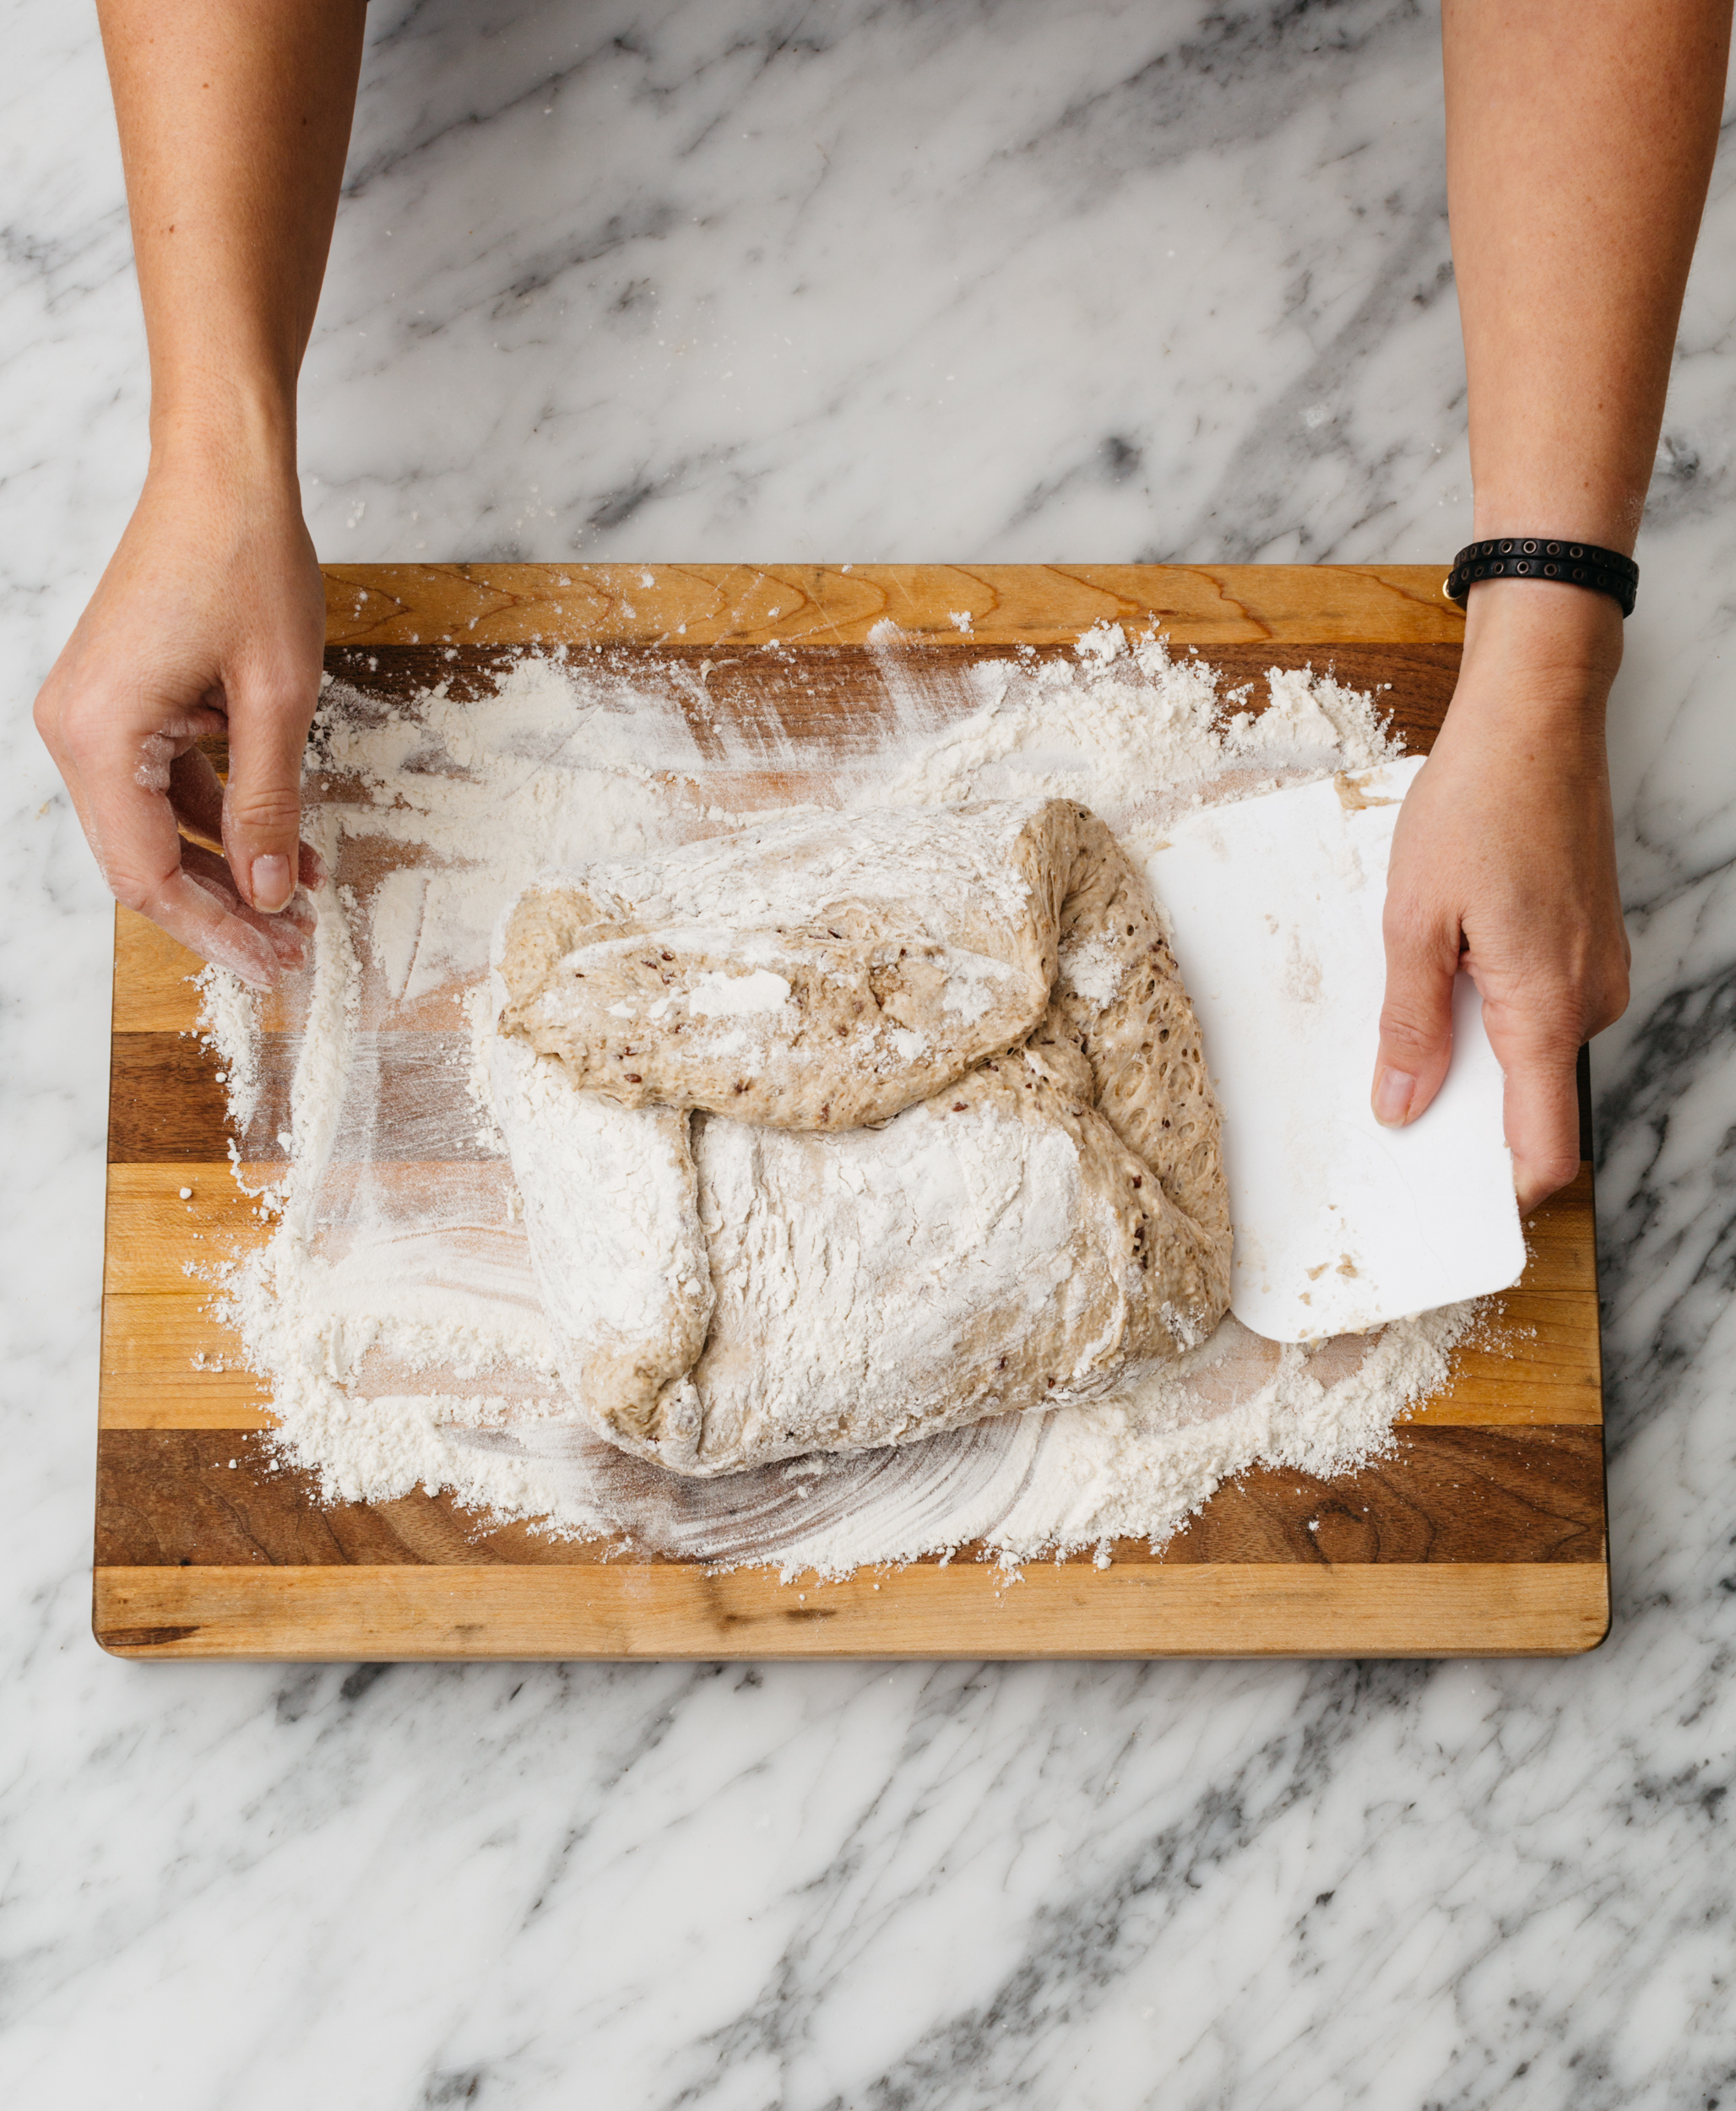
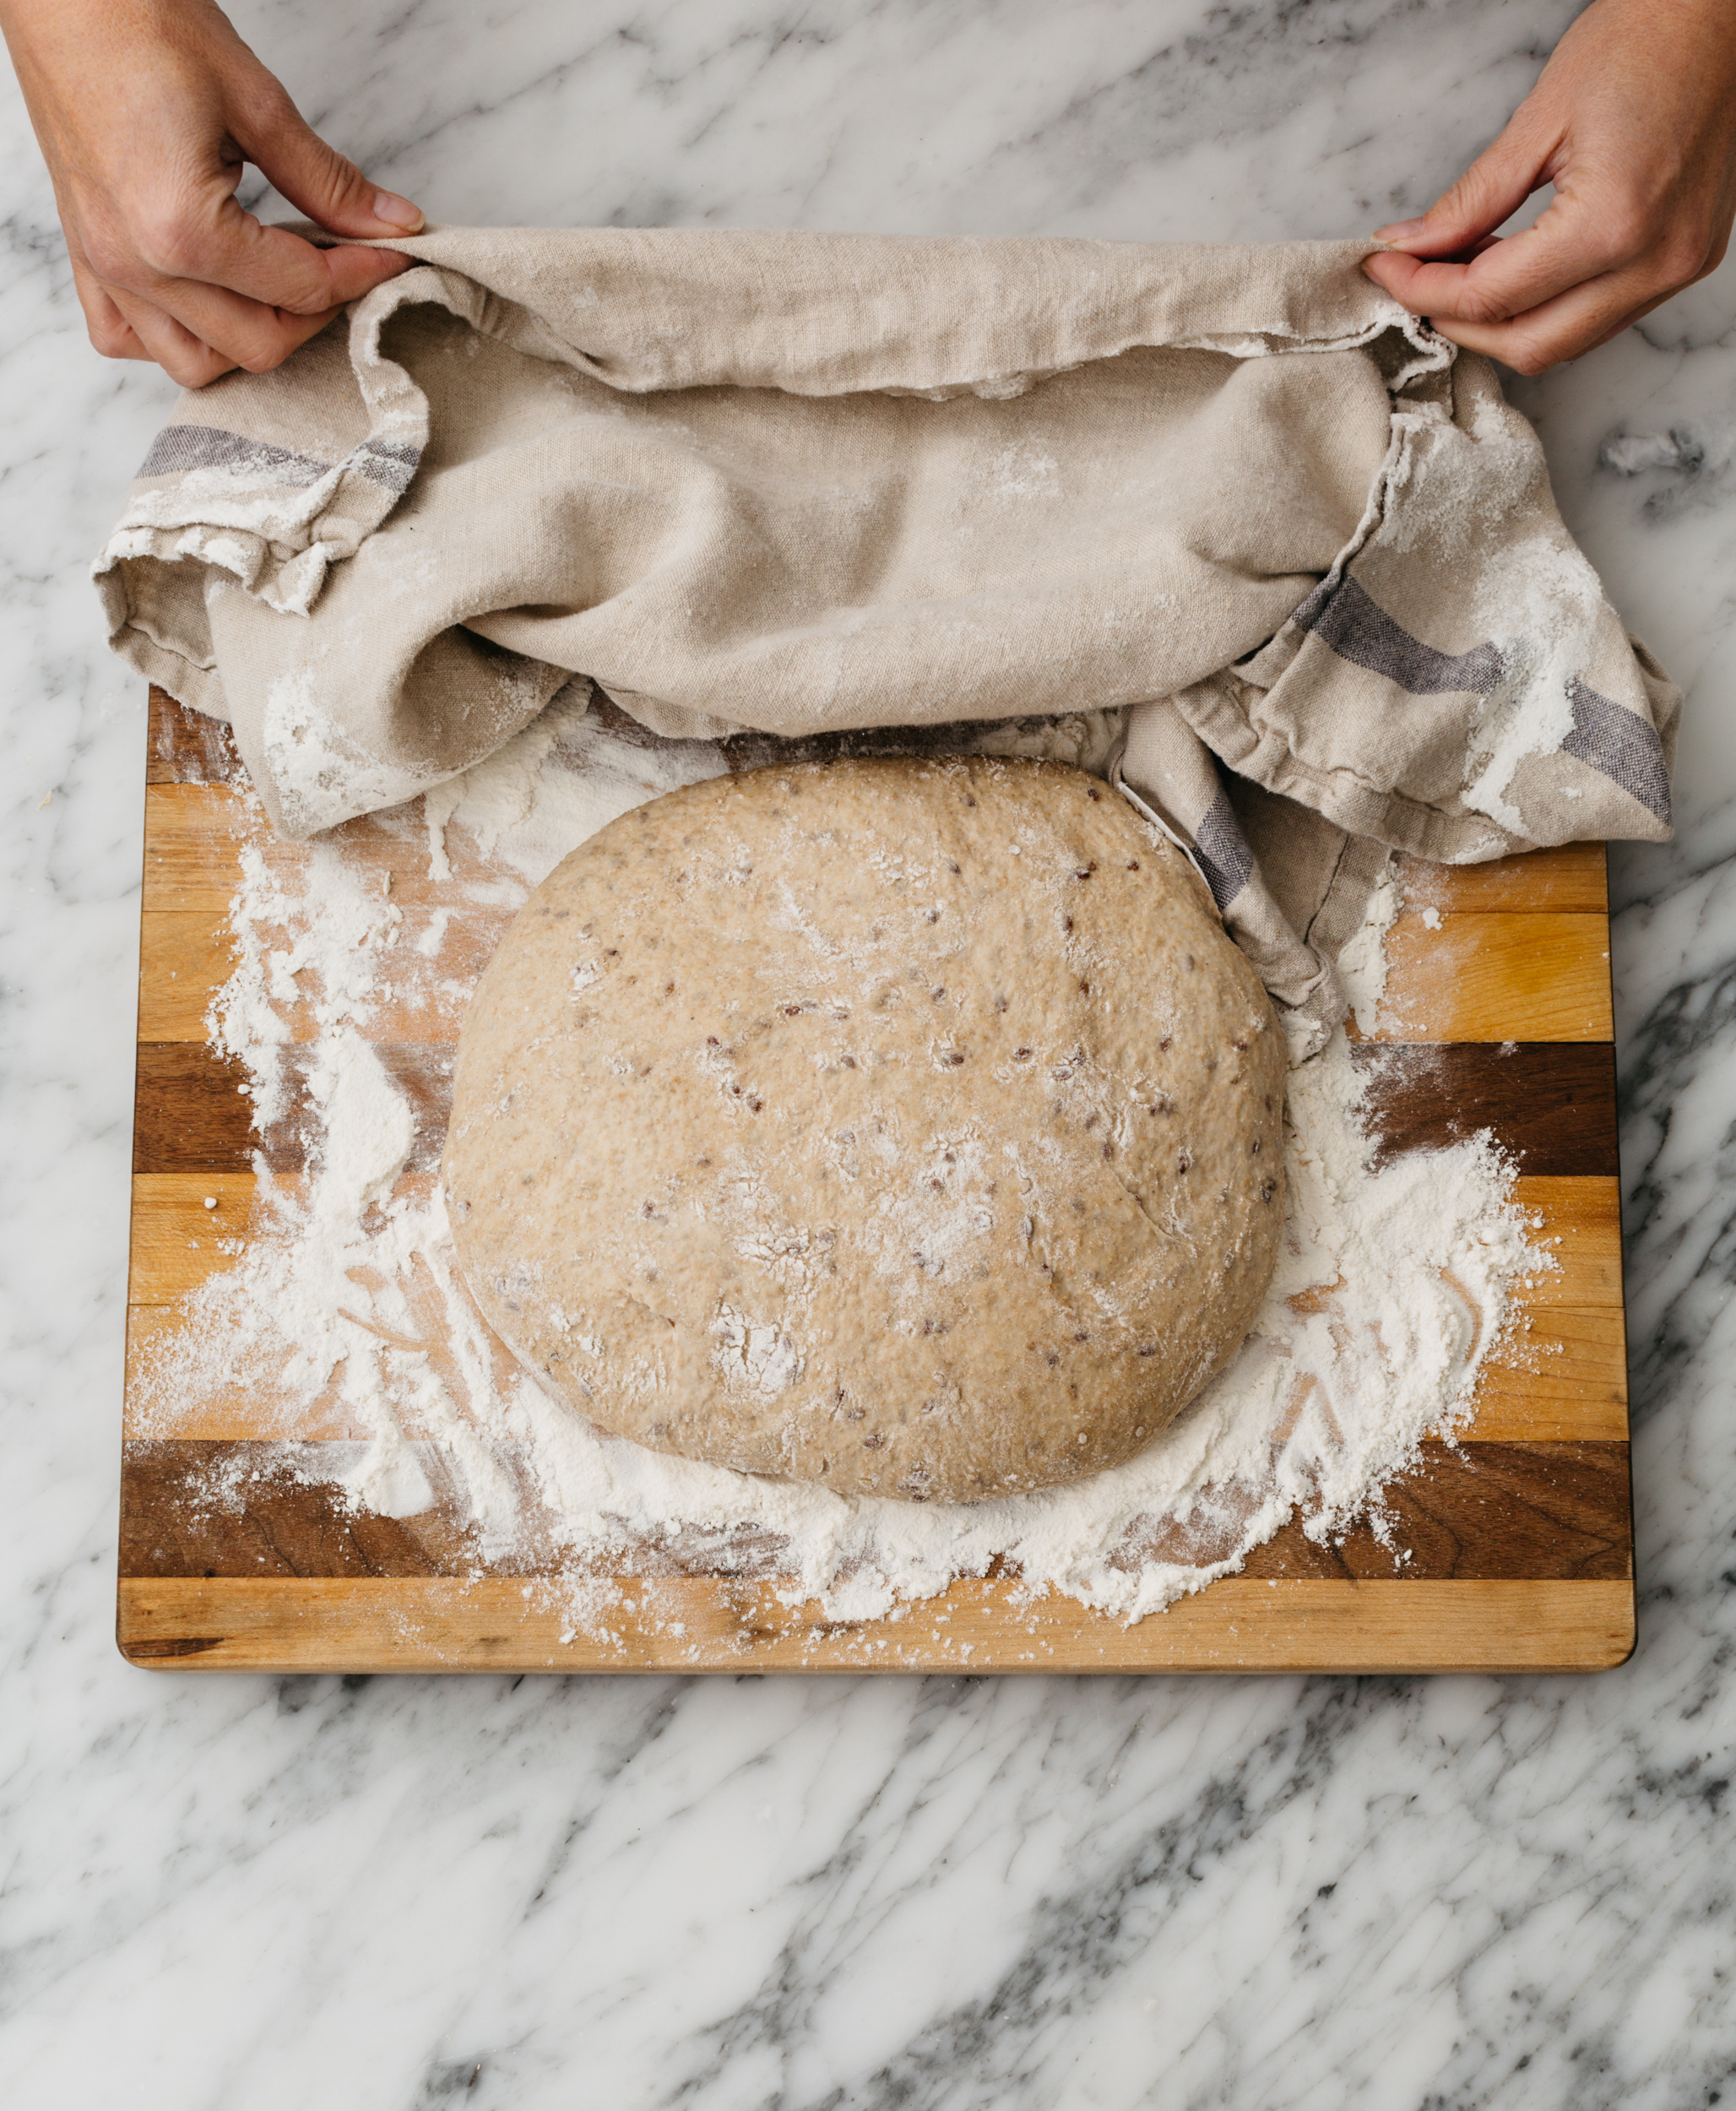
The next day, preheat the oven to 475°F and place the lidded Dutch oven inside. Pour out the dough onto a well-floured surface and using the scraper or spatula fold the edges over like an envelope, being careful not to work the dough too much. Turn the dough over and, working quickly, shape it into a ball by rotating it with the palms of your well-floured hands. Liberally flour the top and bottom of the loaf and cover with a floured towel. Set aside to rise 1–2 hours.
(At this point, I’ll often mix up another batch of dough right in the same bowl or plastic tub and put it in the fridge to rise. It can stay there, fermenting away, for up to a week before I take it out, give it a few floured fold-overs and let it rise on the counter, 1–2 hours, before baking. This way there’s always a dough ready to bake when the last slice of toast is eaten!)
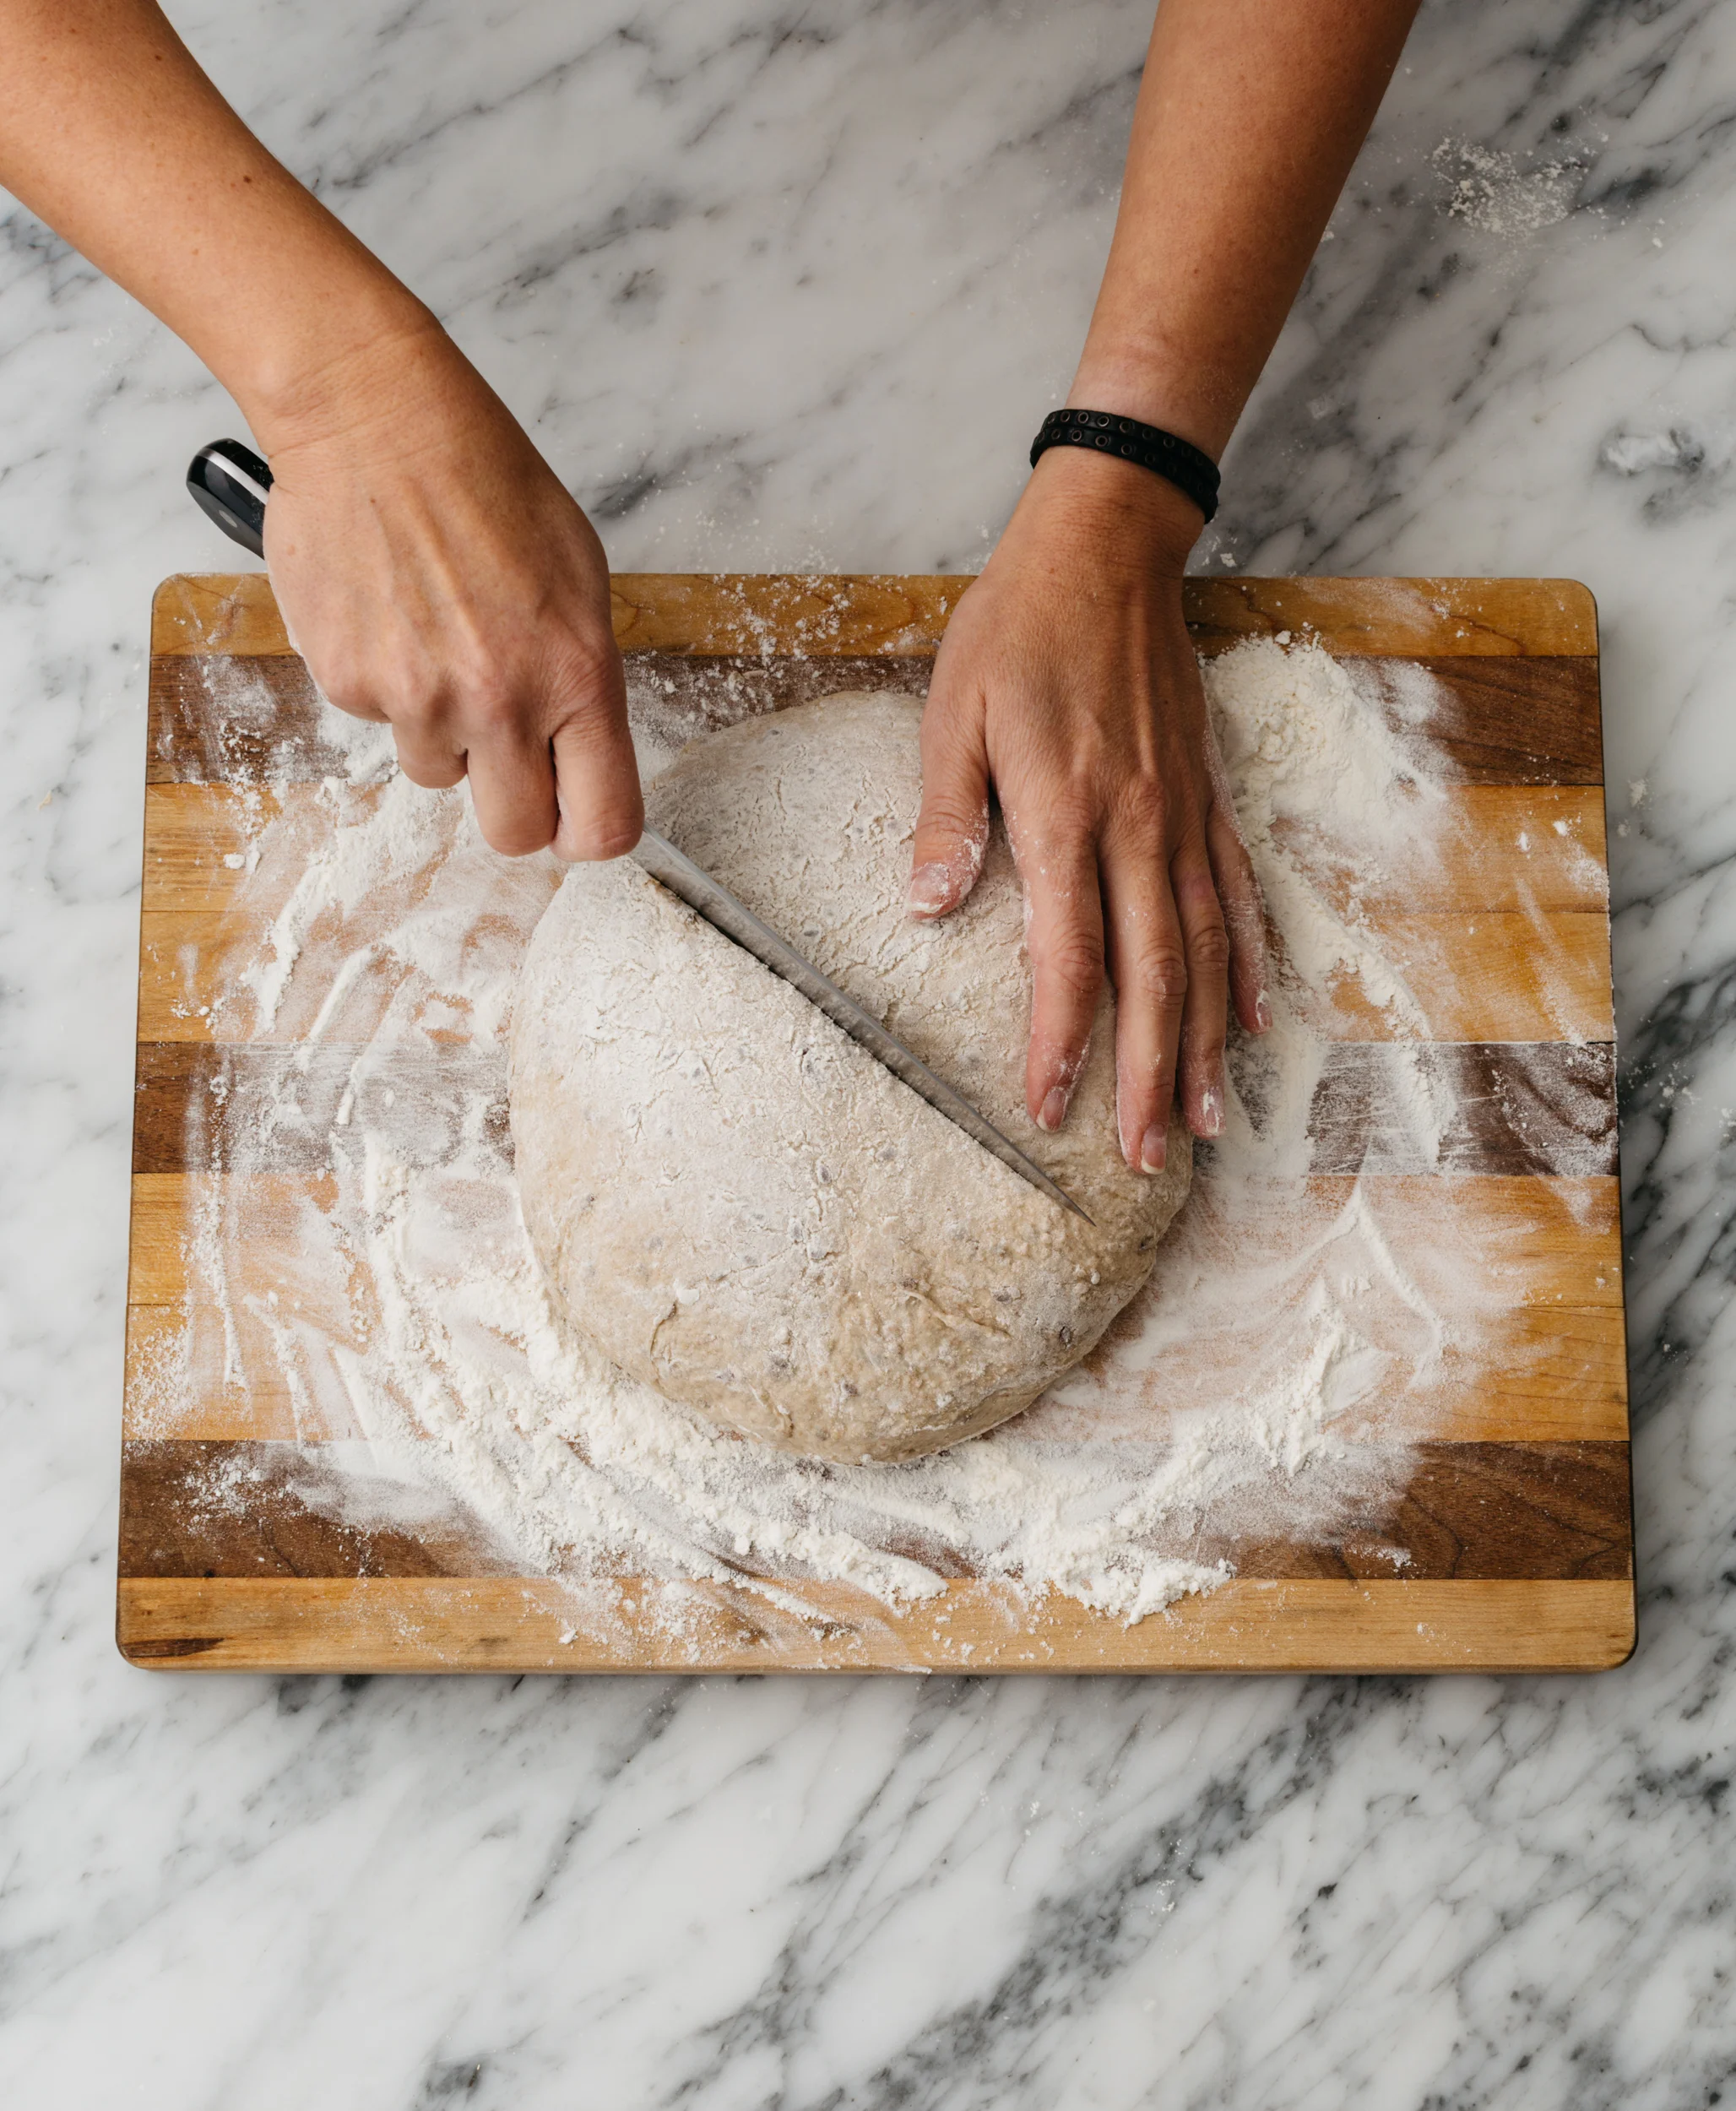
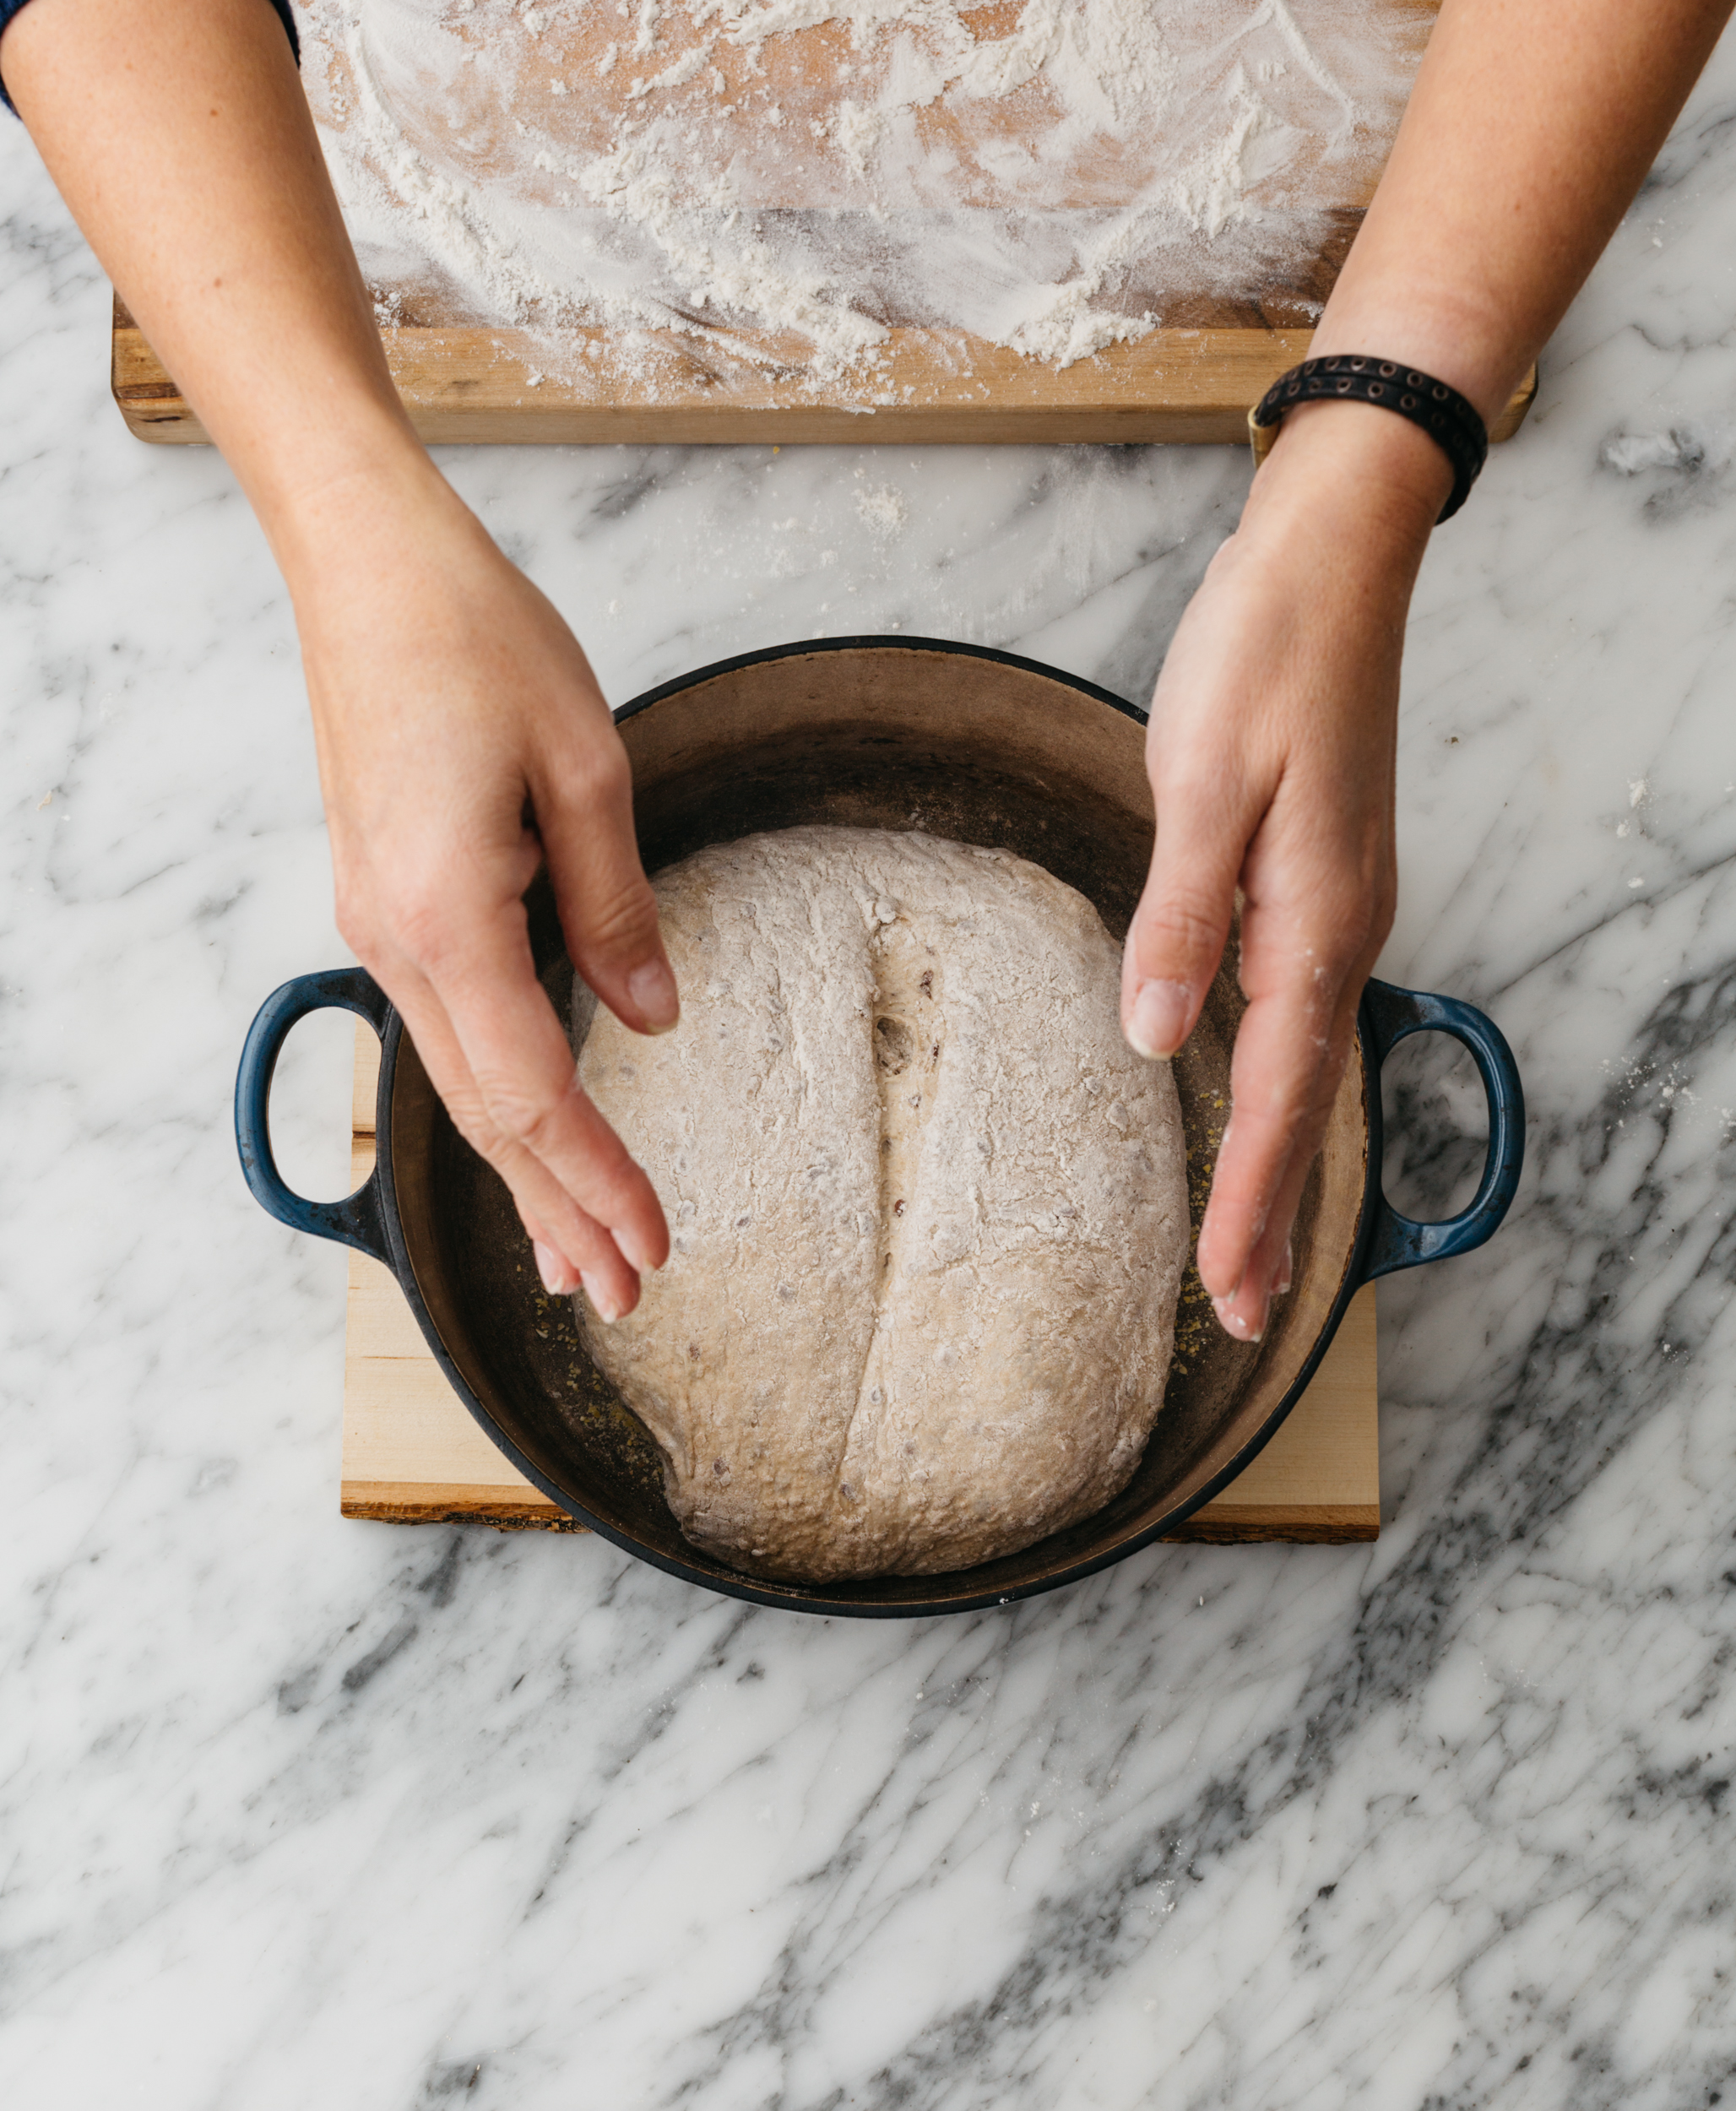
When the dough has risen, remove the pot from the oven and take off the lid. Sprinkle the cornmeal onto the bottom of the pot. Lift the dough with the scraper or a spatula and your hands and quickly drop it into the pot. (Be careful—the pot is hot.) Take a sharp knife and make a few long slashes through the top of the dough to allow the steam to escape, quickly put the lid on the pot and return it to the oven.
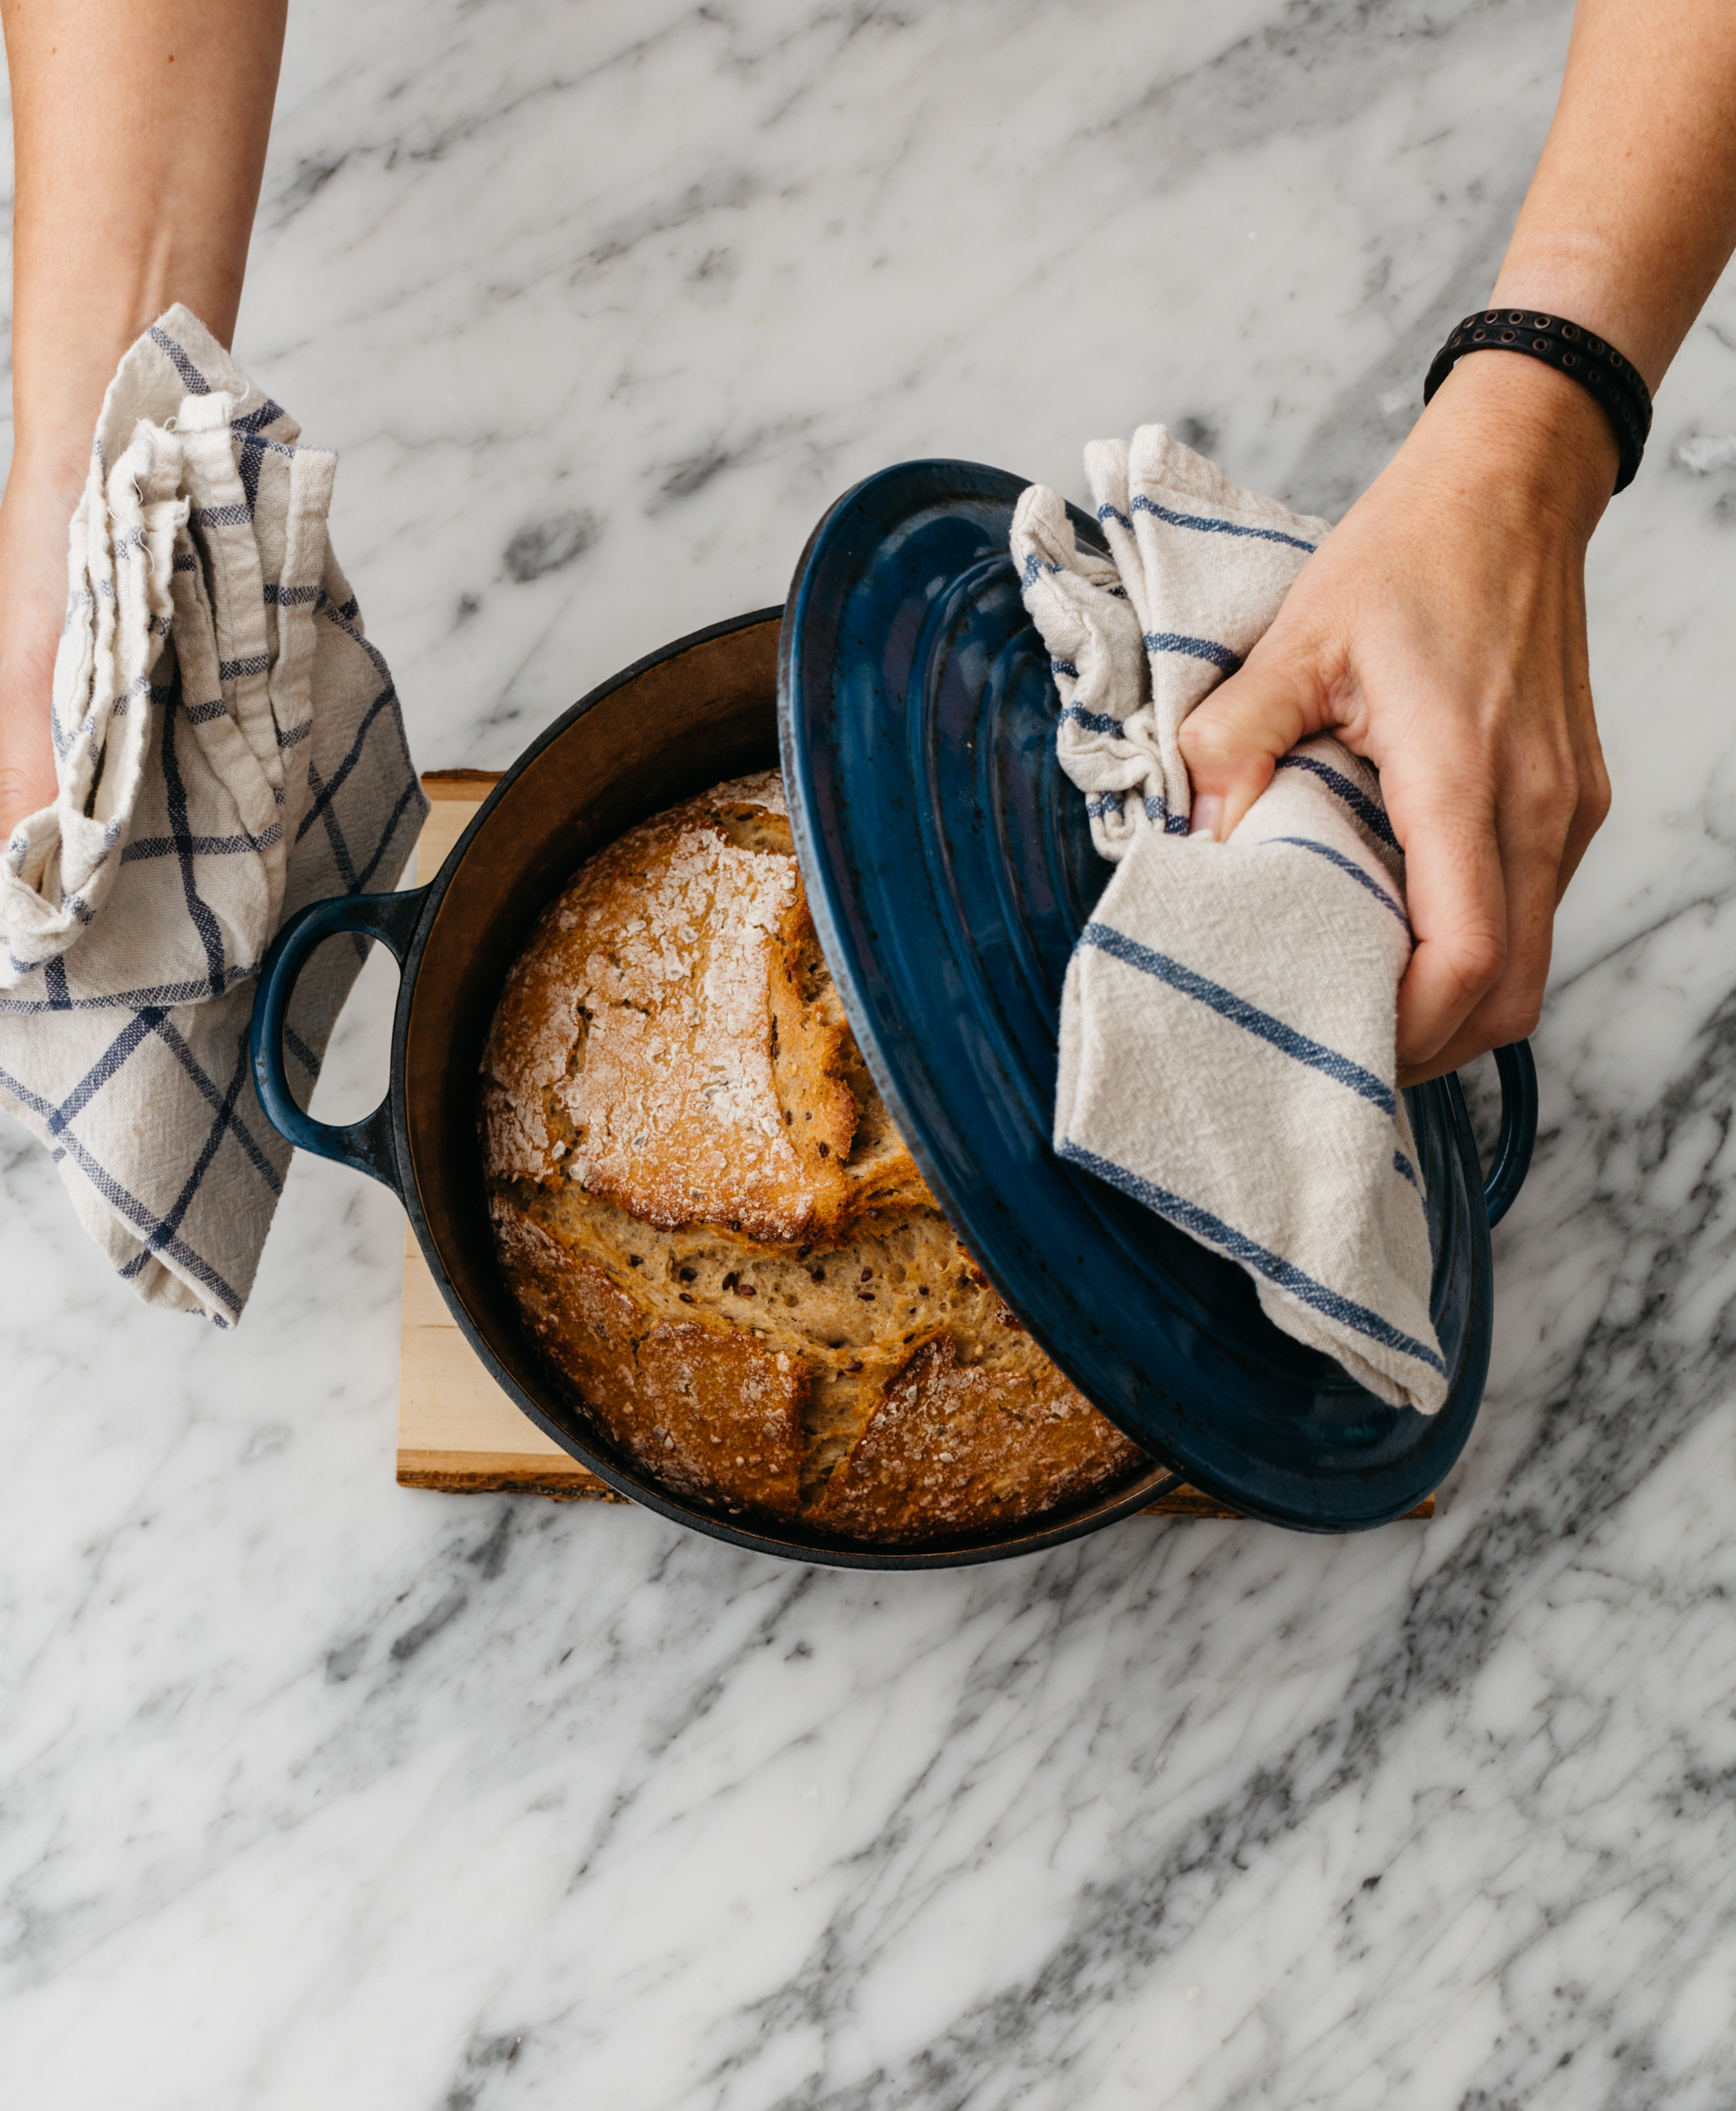
Bake, covered, for 30 minutes. Remove the lid and bake an additional 20 minutes or until deeply browned and cracked on top (the darker, the better). Remove bread from the pot and set on a wire rack to cool before slicing.
A note on flours:
The best locally grown flours come from Four Star Farms in the Pioneer Valley and Alprilla Farm on the North Shore. Alprilla’s flours are available mostly through their grain CSA, while Four Star distributes it regionally and sells online as well. I’ve bought it retail at Volante Farms in Needham and City Feed and Supply in Jamaica Plain. The freshness of these flours requires freezer storage to keep them at their best.
If you would like to try grinding your own flour and have a high-powered blender (like a Blend-Tec or a VitaMix), use 1 cup at a time of whole-wheat berries straight from the freezer. Don’t blend longer than 1 minute as the flour will get very hot, but you should be able to produce a fairly fine flour in just about 55 seconds. Pass through a fine sieve and use as you would any whole-wheat flour.
This recipe appeared in the Winter 2018 issue.